

Sending Emails using Nodemailer, and EJS Template in NestJS
Send email directly from Nest application to user inbox for any event/action happened in app using Nodemailer and NestJS


In this blog post, we will learn how to send emails to a user's email box from the Nest application using Nodemailer. So, let's learn:-
Prerequisites
To follow this tutorial, you will need:
Node.js v14+ in your local machine/system.
Familiarity with JavaScript and TypeScript.
OOPs concepts.
Any code editor
Step 1 — Setting up the Project
Let's setup the project for our tutorial. Install Nestjs globally on your local machine. We will initialize our project with Nest CLI and Nestjs package. To install Nestjs globally, run the following command in the terminal/command line:-
npm i -g @nestjs/cli
Now, open another terminal/command line and run the below command, to initialize the project:-
nest new project-name
The above command will create a new project directory, and populate the directory with the initial core Nest files and supporting modules, creating a conventional base structure for your project.
Step 2 — Install Dependencies
After the successful setup of the project, add the @nestjs-modules/mailer and the peer dependency nodemailer to your Nest application.
npm i --save @nestjs-modules/mailer nodemailer
npm i --save-dev @types/nodemailer
Next, install the EJS template engine for creating your email templates.
npm i --save ejs
Now, install the @nestjs/config dependency, which enables you to load your configurations and credentials from .env files.
# config
npm i --save @nestjs/config
Add the ConfigModule to the imports list of your AppModule.
// app.module.ts

import { Module } from '@nestjs/common';
import { ConfigModule } from '@nestjs/config';
import { AppController } from './app.controller';
import { AppService } from './app.service';

@Module({
  imports: [
    ConfigModule.forRoot({
      isGlobal: true, // no need to import into other modules
    }),
  ],
  controllers: [AppController],
  providers: [AppService],
})
export class AppModule {}
Create a .env file in your root directory.
# mail
MAIL_HOST=smtp.example.com
SMTP_USERNAME=user@example.com
SMTP_PASSWORD=topsecret
Step 3 — Create an email template
Creating templates folder
mkdir src/mail/templates
Now, we need to create an email template welcome.ejs in the src/mail/templates folder. Add the following simple template for user welcome, when the user sign's up.
<p>Hey <%= name %>,</p>
<p>
  Thanks for signing up for Nice App. We're very excited to have you on board.
</p>

<p>To get started using Nice App, please confirm your account below:</p>
<p>
  <a href="<%= confirmation_url %>">Confirm you account</a>
</p>

<p>
  If you're having trouble clicking the confirm account button, copy and paste
  the below URL into your web browser.
</p>

<a href="<%= confirmation_url %>"><%= confirmation_url %></a>
Those <%= %> brackets are ejs expressions and you will provide the context later while sending an email.
Step 4 — Email Module
Create Email module and service via the Nest CLI:-
nest g module email
nest g service email
Import the MailerModule into your EmailModule and configure your mail server transport via smtp. Provide a default from email address to consistently use the same mail throughout your application. No worries, you can also override the default whenever necessary. Last step, configure the templates folder and the adapter in this case EJSAdapter. Find out more about the other template adapters in the Mailer documentation.
// email.module.ts

import { MailerModule } from '@nestjs-modules/mailer';
import { EjsAdapter } from '@nestjs-modules/mailer/dist/adapters/ejs.adapter';
import { Global, Module } from '@nestjs/common';
import { MailService } from './email.service';
import { join } from 'path';
import { ConfigService } from '@nestjs/config';

@Global()
@Module({
  imports: [
    MailerModule.forRootAsync({
      useFactory: async (config: ConfigService) => ({
        transport: {
          host: config.get('MAIL_HOST'),
          secure: false,
          auth: {
            user: config.get('SMTP_USERNAME'),
            pass: config.get('SMTP_PASSWORD'),
          },
        },
        defaults: {
          from: `"Nice App" <${config.get('SMTP_USERNAME')}>`,
        },
        template: {
          dir: join(__dirname, 'templates'),
          adapter: new EjsAdapter(),
          options: {
            strict: false,
          },
        },
      }),
      inject: [ConfigService],
    }),
  ],
  providers: [EmailService],
  exports: [EmailService],
})
export class EmailModule {}
Export the EmailService to provide it via Dependency Injection (DI) for your controllers, resolvers and services.
Sending Email
Add MailerService to your own EmailService and implement your mailing logic here. Let's send a user welcome email using the template welcome.ejs. You'll need to provide <%= name %> and <%= confirmation_url %> under the context key.
// email.service.ts

import { MailerService } from '@nestjs-modules/mailer';
import { Injectable } from '@nestjs/common';
import { User } from './../user/user.entity';

@Injectable()
export class EmailService {
  constructor(private mailerService: MailerService) {}

  async sendUserWelcome(user: User, token: string) {
    const confirmation_url = `example.com/auth/confirm?token=${token}`;

    await this.mailerService.sendMail({
      to: user.email,
      // from: '"Support Team" <support@example.com>', // override default from
      subject: 'Welcome to Nice App! Confirm your Email',
      template: './welcome', // `.ejs` extension is appended automatically
      context: { // filling <%= %> brackets with content
        name: user.name,
        confirmation_url,
      },
    });
  }
}
// src/user/user.entity
export interface User {
  email: string;
  name: string;
}
Step 5 — Using Email Service
Create Auth module and service via the Nest CLI:-
nest g module auth
nest g service auth
Add the EmailModule to the imports list of your modules which need to use the EmailService.
// auth.module.ts

import { Module } from '@nestjs/common';
import { AuthController } from './auth.controller';
import { AuthService } from './auth.service';
import { EmailModule } from './email/email.module';

@Module({
  imports: [EmailModule],
  controllers: [AuthController],
  providers: [AuthService],
})
export class AuthModule {}
Now you can add EmailService to the constructor of your controllers, resolvers and services
// auth.service.ts

import { Injectable } from '@nestjs/common';
import { EmailService } from './../email/email.service';
import { User } from './../user/user.entity';

@Injectable()
export class AuthService {
  constructor(private emailService: EmailService) {}

  async signUp(user: User) {
    const token = Math.floor(1000 + Math.random() * 9000).toString();
    // create user in db
    // ...
    // send welcome mail
    await this.emailService.sendUserWelcome(user, token);
  }
}
Create an endpoint for the signup, which will receive the user's data. Import AuthService in app.controller.ts.
// auth.controller.ts

import { Body, Controller, Post } from '@nestjs/common';
import { User } from '../user/user.entity';
import { AuthService } from './auth.service';

@Controller('auth')
export class AuthController {
  constructor(private readonly authService: AuthService) {}

  @Post()
  signUp(@Body() userDto: User): Promise<void> {
    return this.authService.signUp(userDto);
  }
}
Add the AuthModule to the imports list of app.module.ts which need to use AuthService.
// app.module.ts

import { Module } from '@nestjs/common';
import { AppController } from './app.controller';
import { AppService } from './app.service';
import { ConfigModule } from '@nestjs/config';
import { AuthModule } from './auth/auth.module';

@Module({
  imports: [
    ConfigModule.forRoot({
      isGlobal: true, // no need to import into other modules
    }),
    AuthModule, //  👈 imported auth module
  ],
  controllers: [AppController],
  providers: [AppService],
})
export class AppModule {}
Step 6 — Nest CLI configuration
When you build your Nest application you will notice that the build output is missing your template files (dist/email/templates).
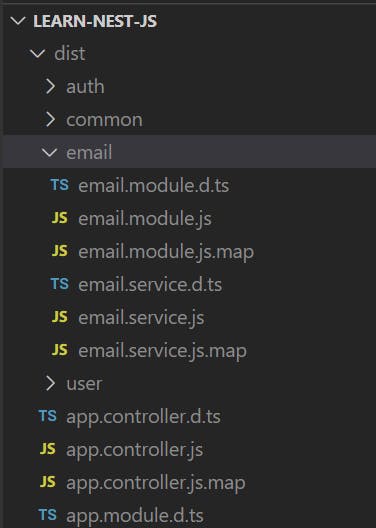
By default, Nest only distributes TypeScript compiled files (.js and .d.ts) during the build step. To distribute your .ejs files, open your nest-cli.json and add your templates directory to the assets property in the global compilerOptions.
// nest-cli.json
{
  "$schema": "https://json.schemastore.org/nest-cli",
  "collection": "@nestjs/schematics",
  "sourceRoot": "src",
  "compilerOptions": {
    "deleteOutDir": true,
    "assets": ["email/templates/**/*"], // "**/*.ejs" all files ending with .ejs
    "watchAssets": true // copy assets in watch mode
  }
}
Run your Nest application and now your template files will be included in the build output. Run the app with:
npm start
Result
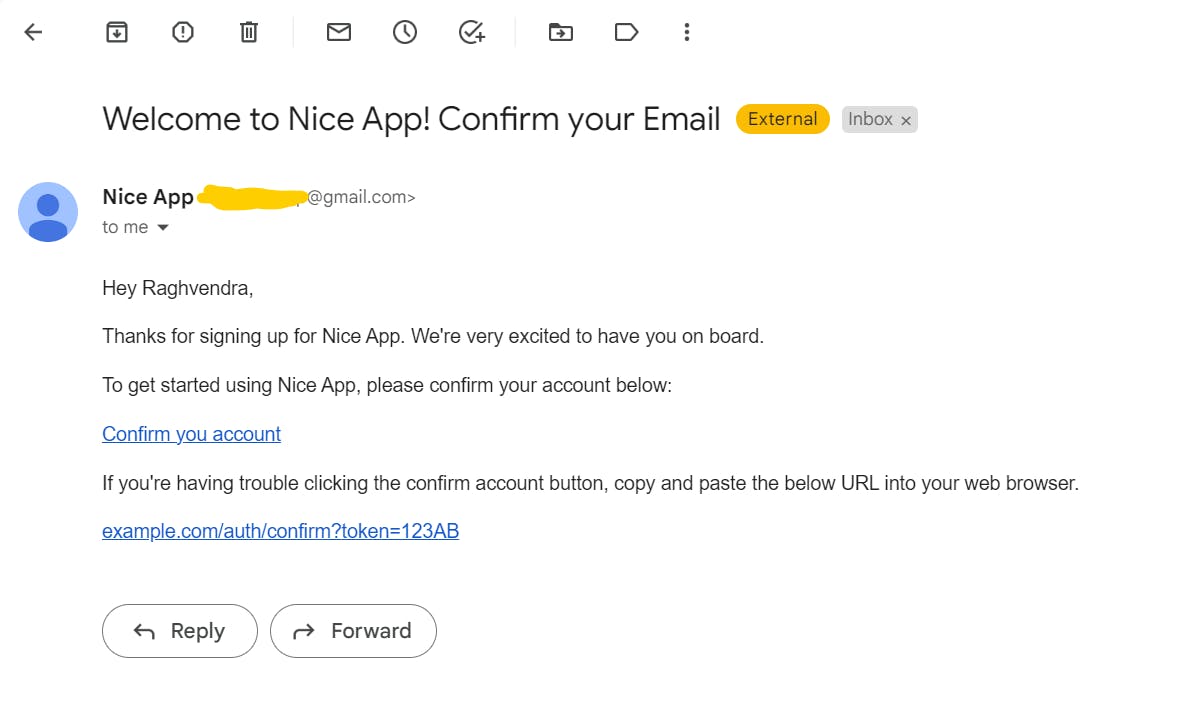
Open Postman or something similar, select POST method and add this route http://localhost:3000/auth. Insert the body in raw JSON format then hit Send button.

That’s cool! We successfully sent an email from our Nest application.
Thanks for reading so far, and I hope you enjoyed following this tutorial along with me! Don’t forget to comment if this article was anyhow useful to you.
See you next time!